


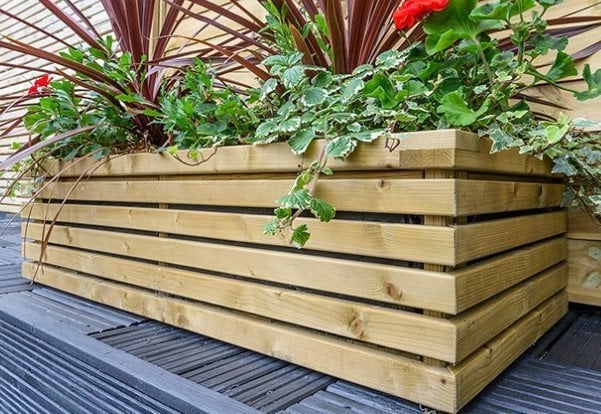
Building a raised retainer bed in your garden using timber sleepers is a fantastic way to create a neat and organized space for plants, vegetables, or flowers.
Our guide takes you through the process of building a raised retainer bed using timber sleepers.
Tailored to all skill levels, this relatively straightforward DIY project can be completed over a weekend.
Approx reading time: 4 minutes
Main image source: grangefencing.co.uk
Materials and tools you’ll need
Materials
Softwood or Hardwood Timber Sleepers (depending on preference)
Gravel or Hardcore (for drainage)
Wood Preservative (if cutting is required)
Topsoil and Compost
Tools
Exterior wood screws – 150mm
exterior wood screws – 250mm
Drill
Saw (if cutting is required)
Tape Measure
Spirit Level
Planning
Choose Location
Choose a suitable location in your garden for the raised bed.
Ensure it’s on relatively flat ground with good sunlight exposure if you’re planning to grow plants that need a lot of light.
Measure The Area
Use a tape measure to mark out the area where you want to place the raised bed.
Design Consideration
Decide on the height of the bed. Typically, a raised bed is around 2 to 3 sleepers high, which provides sufficient depth for most plants.

Preparing the ground
Clear the area
Remove any grass, weeds or debris from the area.
If necessary, dig out the ground to level the area where the sleepers will sit.
Add a Weed Membrane (optional)
Lady down a weed membrane over the cleared area to prevent weeds from growing through the soil in your raised bed.
If you choose to line your retainer bed, ensure to choose a material that is porous to allow excess water to escape.

Assemble the first layer
Position sleepers into shape
Lay the first layer of sleepers directly on to the prepared ground in a rectangular shape, with the narrowest side of the length facing down.
2.4m length sleepers can be used for the longest sides, and one sleeper cut in half to make the shorter sides. For a larger bed, 4.8m sleepers can be used for the longest sides and 2.4m sleepers can be used for the shorter sides.
Use a spirit level to ensure they are even. Adjust by adding or removing gravel underneath as needed.
Cut Sleepers
If your design requires sleepers to be cut to size, measure and mark them before cutting with a saw. Ensure all cuts are straight for a neat finish, and a wood preservative is applied to the ends.

Securing the frame
Secure the frame
Using two 150mm timber screws at each corner, attach the sleepers together.
Ensure a solid connection is made with the adjoining sleeper.
Add a base layer
Hardcore or gravel are popular base layer options for retainer beds as they aid with drainage, are inexpensive and add stability to the end structure.


On to the second layer
Lay sleepers on top of your first layer, ensuring joints are staggered, just like bricklaying, to ensure your frame is strong.
Working one corner at a time, secure with two 150mm screws, and repeat until all corners are secure.
If you’re working with hardwood, we recommend pre-drilling pilot holes to prevent splitting.
Securing the two layers together
Ensure both layers are lined up and the edges of the frames are not overlapping.
Drill pilot holes first to prevent splitting.
Working from the top of top layer, drill down and attach the two layers together with 250mm long timber screws.
On sleepers longer than 2.4m, we also recommend securing along the longest edge in addition to the shorter side, for added stability.

Adding an optional third layer
Lay the sleepers on top of the newly secured frame as before.
Ensure the joints at the ends of the sleepers are staggered from the layer below.
Working one corner at a time, secure each corner of the frame with two 150mm wood screws, and ensure a stable connection.
When you’re ready to secure your third layer to the frame below, do so using 250mm in the same manner as before. Don’t forget those pilot holes to prevent splitting.
Finishing touches
Check your newly constructed raised sleeper bed with a spirit level to ensure it is even and sturdy, and make any adjustments if needed.
Fill the raised bed with quality topsoil and compost, leaving a few inches at the top for mulch or watering, ensuring a rich growing environment for your plants.
Plant your flowers, shrubs, vegetables and herbs, taking into account their sunlight and water requirements when choosing their location within the bed.
Looking after your new raised retainer bed
Keep an eye on moisture levels, especially during dry spells, as raised beds have a tendency to drain more quickly than ground level beds.
Regularly check for weeds.
Periodically check the structure for signs of wear or loosening, and make repairs as needed.
A raised retainer sleeper bed is not just a practical addition to your garden – it’s a feature that adds structure, depth and charm to any outdoor space.
Whether you’re growing vibrant flowers, fresh vegetables or decorative shrubs, the versatility of sleeper beds allows you to create a tailored design that suits your needs.
With thoughtful planning and careful construction, your raised bed will provide a lasting, beautiful focal point while making gardening more accessible and enjoyable.

FREE delivery available within a 20 mile radius of one of our branches.
We deliver Monday to Friday, between 8am and 5pm and usually within 3 working days of receiving your order.